PHPMyAdmin is a graphical web interface to manage all databases which can be install on your Ubuntu 14.04 Operating System.
Through PHPMyAdmin, you can create, delete and run database queries with more ease. If you are not familiar with MySQL from a command line, PHPMyAdmin is the best alternative I can suggest.
Basically, most of the users who work with MySQL, like to work with a graphical user interface instead of using from the command line.
So, users can interact with MySql directly from a graphical web interface.
In this tutorial, we'll show you how to install PHPMyAdmin on Ubuntu 14.04 so that you can manage MySQL databases on your Ubuntu server from easy to use web interface.
To install it in your Ubuntu 14.04, make sure LAMP stack is already installed on it before.
We will explain, how to install LAMP stack on a Ubuntu 14.04 in our coming posts.
Step 1: Installation of PHPMyAdmin
Before installing PHPMyAdmin on Ubuntu 14.04, make sure to update all list of available packages. It is always good to update all packages before you install anything new.
apt-get -y updateThat’s it, now you just need to run a simple command for installing it with apt-get.
apt-get -y install PHPMyAdminStep 2: Basic Configuration
Once the installation rolls, you need to follow few instructions regarding the basic configuration.
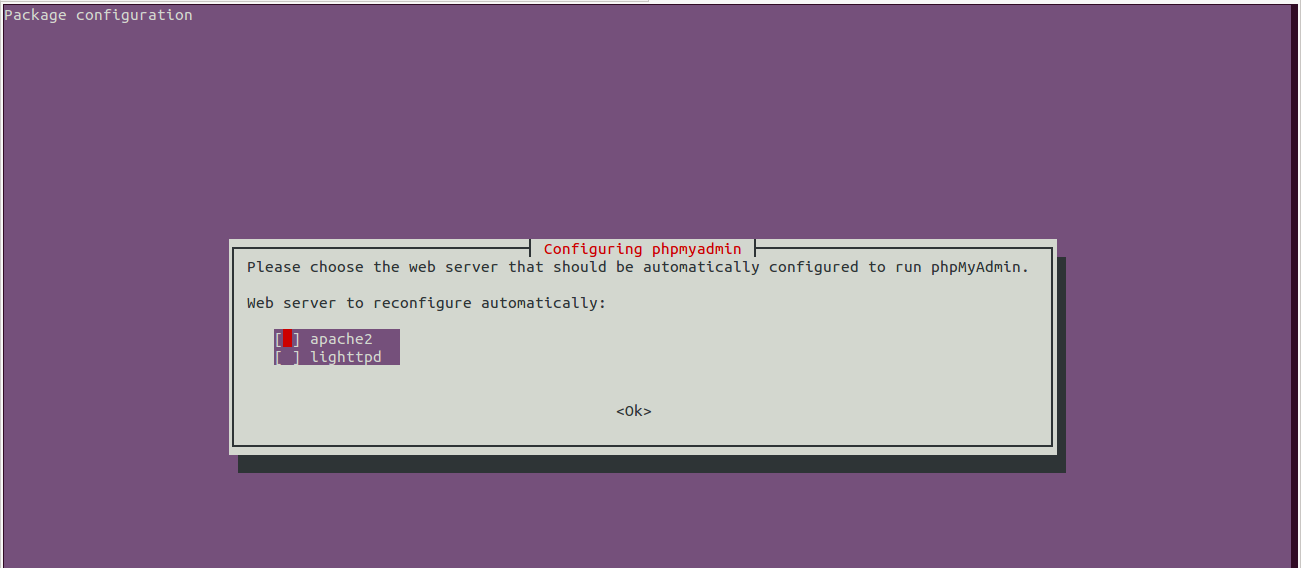
On your first screen, select apache2 by using the spacebar, then hit “enter” to continue.
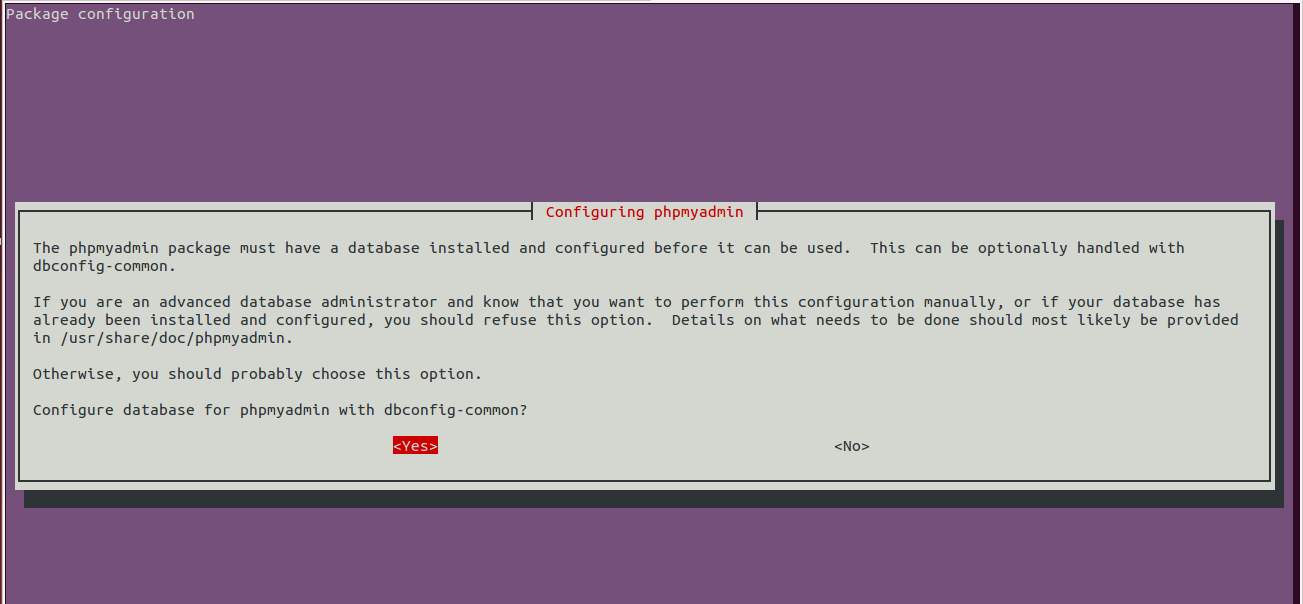
It switches to the second screen, here it asks “configure the database for PHPMyAdmin with dbconfig-common?”, select Yes, then hit “enter” to continue.
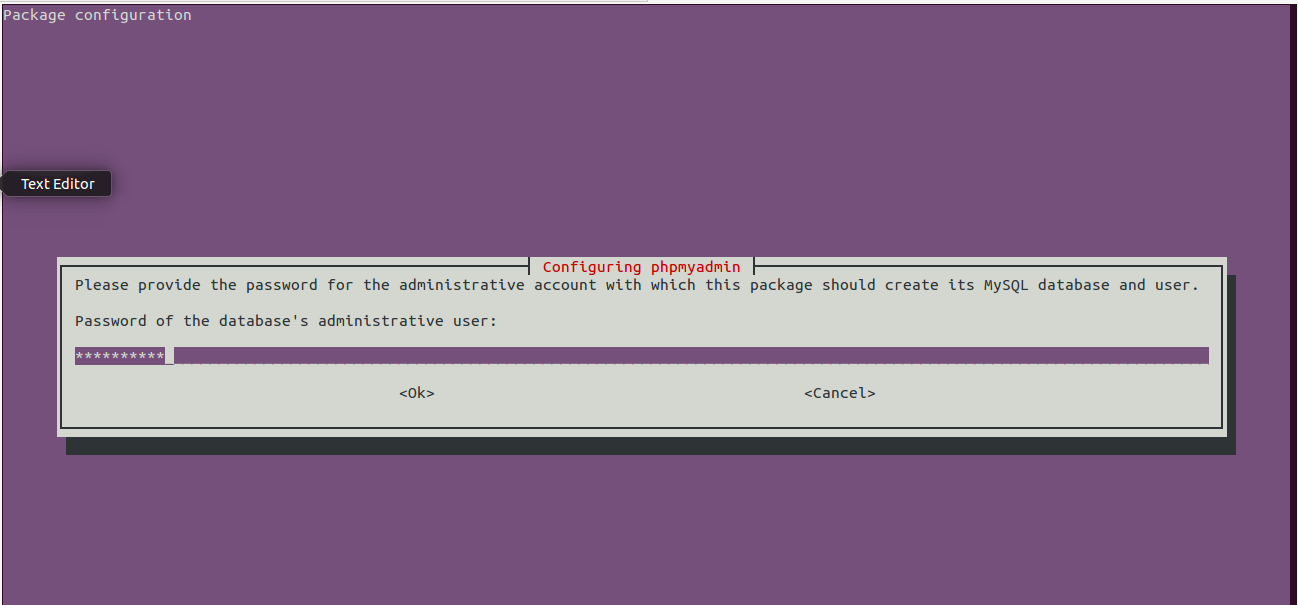
The third screen gives you the option to enter your MySQL password, then hit enter to continue.
Finally, at the fourth screen set the password you’ll use to log into it, hit enter to continue, and confirm your password.

Step 3: Finish the Configuration of Apache
You can edit apache configuration using pico text editor.
pico /etc/apache2/apache2.confAdd the following to the bottom of the file:
#PHPMyAdmin Configuration
Include /etc/PHPMyAdmin/apache.conf
Then exit and save the file with the command
:wqAnd, restart Apache 2 with the following command:
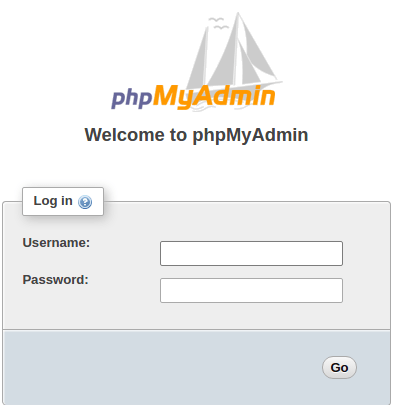
service apache2 restartVerify that it is working by visiting the_IP_of_your_server/PHPMyAdmin.
For example http://127.0.0.1/phpmyadmin. It shows you an interface like below.
I want to show you another interface which would be like below image once we login to the PHPMyAdmin panel.

Note
You can learn more about managing, edit, add databases and as well work on queries in PHPMyAdmin. There are different tutorials which can help you learn more deeply. You can click here to know more about it.
Conclusion
The reader of this article can easily install PHPMyAdmin with no more hassles after complete reading it. Hope you enjoy reading this article? looking forward for your review on this.
The Best VPS Hosting Servers in India
We at FastWebHost India provides amazing VPS hosting service. It's a real value for money web hosting servers you ever find. We support 24/7 no matter what. Give us a try and see yourself.