WinSCP is a free open source FTP tool, used to transfer files from local PC to remote server in a secure way. Establishing a secure connection between local PC to a server requires SSH connection. It should be enabled in your web hosting server. Otherwise WinSCP can also be used as a normal FTP client.
Let me show you how to transfer your files to our server from your end.
How to install WinSCP ?
Step 1
Downloading WINSCP to your computer from winscp page.
If you have downloaded and installed it already follow our third step which is how to connect and transfer files.
Step 2
Double click on the installation you have done. Just a few clicks that's it your installation will be done.
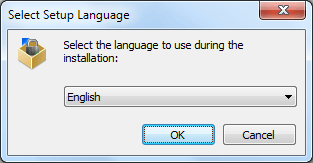
- Select the language you wish to have and click OK.
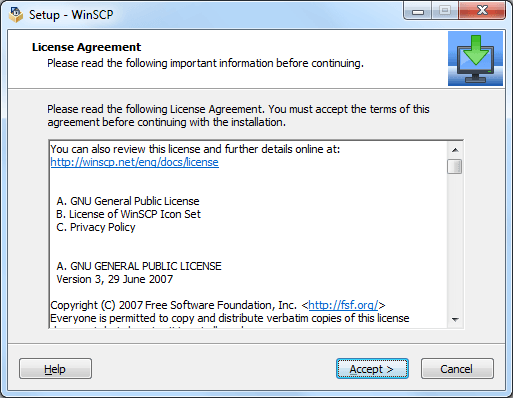
- It will redirect to License agreement page, you need to accept it.
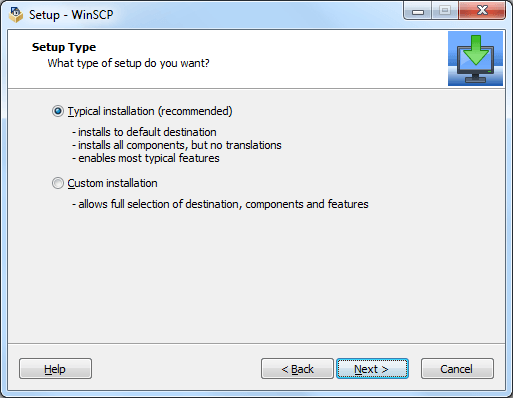
- It takes you to the next step and follow my instructions to complete this step. Setup Type --> select "Typical installation" and click on "Next" .
- Than it redirects you to next step where you need to select user settings. Initial user settings --> where you can select either "Commander" or "Explorer" based on the user interface style you require.
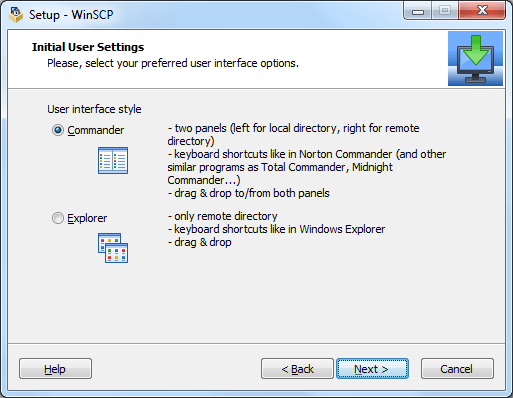
Commander and Explorer are both 2 different interfaces, we recommend you to use "Explorer" as from user interface where you can just drag and drop the files. Whereas in "Commander" you need to execute commands.
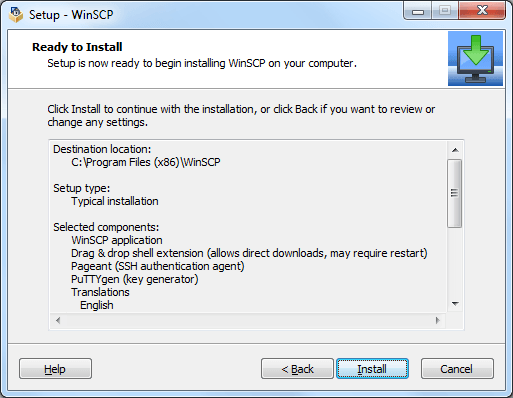
After selecting the interface, a screen opens "Ready to Install" --> Click on "Install". That's it, it completes WinSCP installation.
Once the installation completes, you need to restart your computer. Reason for restarting the computer is, some functions may not be available if you not do so.
Step 3
Connect to FTP/SFTP server. Open the WinSCP installation and you need to enter below details.
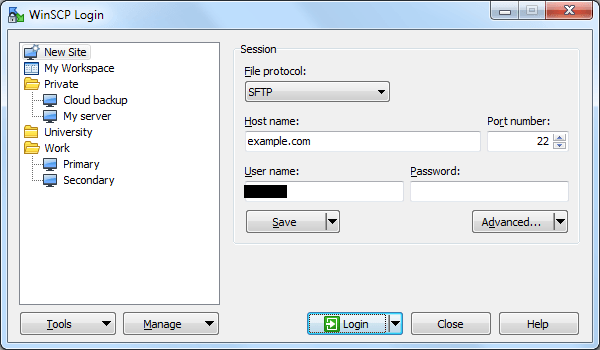
- File protocol - Select as per your wish
- Hostname - You can give your DomainName/IP in this field.
- Port number - As per the protocol you select you can give the port number. 21 for FTP and 22 for SFTP
- Username & Password - Give your Username and Password. If you are not aware of these details you need to contact your WebHosting provider.
- Click on "Login".
You can save the details entered above where as when you connect to the server next time it may not ask all the details to enter it again. So just click on "Save" button. Next time it "Saves your time :-)"
That's it, you are now connected to server. You can transfer files happily and securely.
I can show you clearly in the below image, how to drag and drop files and upload them to your web server.

Hope this will help you transfer your website files to WebHosting server. Love to hear your feedback. Thank you !